Integrating Grass Procreate Brushes into Your Digital Illustration Workflow
Digital landscape illustration requires a balance between artistic vision and technical efficiency. For artists working on the iPad, the ability to render natural elements quickly without sacrificing detail is a critical component of a sustainable creative process. Grass Procreate Brushes offer a specialized solution for this specific challenge, allowing creators to generate realistic vegetation with minimal friction. By integrating these tools into your existing digital art pipeline, you can reduce the time spent on repetitive texturing tasks and focus more on composition, lighting, and narrative depth.
This set is designed specifically for the Procreate application on Apple iPad. It is important to note that these assets are not compatible with Adobe Photoshop, Clip Studio Paint, or other desktop-based graphic editing software. Understanding this limitation early in your planning phase ensures that you allocate these resources correctly within your toolset. When used within the intended ecosystem, these brushes streamline the creation of natural environments, making them an valuable asset for concept artists, illustrators, and hobbyists alike.
The Role of Specialized Brushes in Creative Planning
Before opening your canvas, effective workflow planning involves selecting the right assets for the job. Using standard round brushes to paint grass blade by blade is inefficient and often results in uniform, unnatural patterns. Grass Procreate Brushes address this by providing pre-configured stamping and scattering mechanisms that mimic the randomness of nature. This shifts your role from manual laborer to art director, where you guide the placement and density rather than drawing every individual strand.
In a professional context, time is a finite resource. Whether you are working on a children’s book illustration, a game environment concept, or a personal commission, the speed at which you can block in backgrounds determines your overall throughput. These brushes fit into the "blocking" and "refining" stages of your project. Initially, you might use broader strokes to establish the mass and flow of the terrain. Later, you can switch to finer tips to add foreground details. This layered approach allows for greater control over the final image quality while maintaining a consistent workflow pace.
Technical Features and Usability
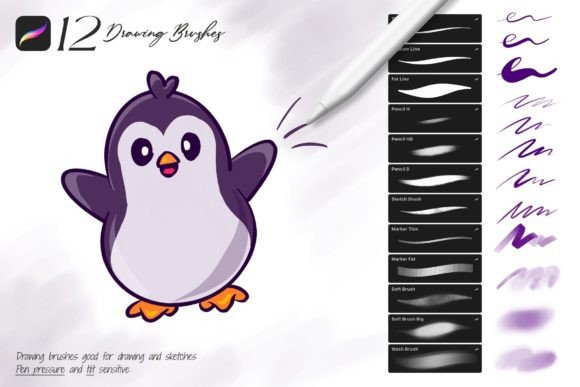
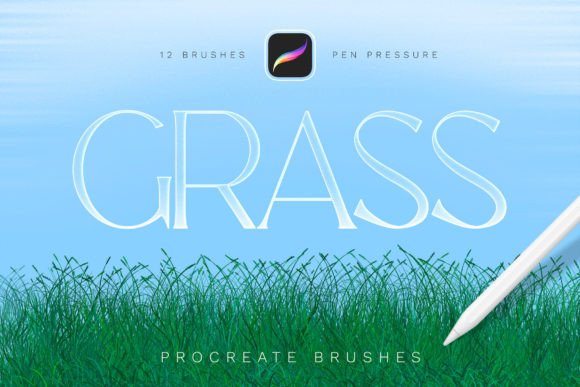
The core value of this brush set lies in its twelve distinct variations, each engineered to respond dynamically to pen pressure. This sensitivity is crucial for achieving organic results. When you press harder, the brush may deposit more pigment or widen the stroke; when you lighten your touch, it creates finer, more delicate lines. This mimics the behavior of traditional media, such as ink pens or dry brushes, providing a tactile connection between your hand and the digital surface.
Another significant feature is the inclusion of different color tones within a single brush stroke. In traditional digital painting, artists often struggle with flat, monochromatic textures. To combat this, they manually sample colors and paint over areas to create variation. These Grass Procreate Brushes automate part of this process by introducing subtle hue shifts as you draw. This means that a single swipe can contain hints of yellow, brown, and deep green, replicating the way light hits real vegetation. This functionality reduces the number of layers and adjustment steps required later in the process, keeping your file structure clean and manageable.
- Pen Pressure Sensitivity: Allows for dynamic line weight and opacity control, essential for natural-looking variation.
- Color Variation: Built-in tonal shifts prevent flat, uniform appearances in large grassy areas.
- Shading Capability: The brushes are designed to layer effectively, making it easy to build up shadows and depth without muddy results.
- Ease of Use: Intuitive design requires minimal setup, allowing immediate integration into current projects.
Installation and Setup Process
Proper installation is the first step in ensuring a smooth user experience. Because these files are formatted specifically for Procreate, the setup process is straightforward but requires attention to file management on your iPad. Follow these steps to integrate the brushes into your library:
- Download the brush set files directly to your iPad. Ensure the files are saved in a location accessible via the Files app, such as iCloud Drive or On My iPad.
- Locate the
.brushsetfile. This format is proprietary to Procreate and contains all twelve brushes in a single package. - Tap on the file. Procreate will launch automatically if it is not already open.
- The application will install the brushes instantly. They will appear at the very top of your brush list, usually in a new folder named after the set.
Once installed, it is advisable to organize your brush library. You might move the new grass brushes into a dedicated "Landscape" or "Textures" folder alongside other environmental tools. This organizational habit saves time during future sessions, as you will not need to search through your entire library to find the right tool. Consistency in organization is a hallmark of efficient digital workflows.
Practical Implementation Techniques
To get the most out of Grass Procreate Brushes, consider how they interact with other elements of your illustration. Grass rarely exists in isolation; it interacts with soil, rocks, water, and light. Here are some practical tips for integrating these brushes into your artwork:
Layering for Depth: Start with a base layer using a darker tone to establish the shadowed undergrowth. Use a larger brush size for this stage to cover ground quickly. On a new layer above, use lighter, warmer tones to represent sunlight hitting the tips of the grass. This separation allows you to adjust the intensity of the highlights independently of the shadows, giving you greater control over the lighting mood.
Varying Brush Selection: With twelve different brushes available, avoid relying on just one or two. Rotate through the set to prevent repetitive patterns. Use finer brushes for foreground elements where detail is visible, and broader, softer brushes for background areas that recede into the distance. This technique, known as atmospheric perspective, enhances the three-dimensional feel of your landscape.
Combining with Other Tools: While these brushes excel at creating vegetation, they work best when combined with other Procreate features. Use the Smudge tool gently to blend harsh edges where grass meets dirt paths. Utilize the Eraser tool with a textured brush to carve out paths or worn areas, adding realism to the scene. Remember that the goal is not to fill every pixel with grass, but to suggest its presence through strategic placement.
Compatibility and Long-Term Value
It is essential to reiterate that these brushes are compatible ONLY with the Procreate application for Apple iPad. They will not function in Adobe Photoshop, Procreate Pocket, or any desktop-based software. This specificity is both a limitation and a strength. By optimizing strictly for Procreate’s engine, the brushes leverage the iPad’s touch interface and pressure sensitivity algorithms to deliver a performance that generic brushes cannot match.
For professionals and entrepreneurs managing multiple projects, investing in high-quality, specialized assets like Grass Procreate Brushes pays dividends in consistency. When you have reliable tools that produce predictable, high-quality results, you reduce the cognitive load associated with technical troubleshooting. This allows you to maintain a steady output rate, meet deadlines more comfortably, and deliver polished work to clients or audiences.
Furthermore, these brushes support long-term skill development. By observing how the brushes handle pressure and color variation, you can learn more about natural textures and lighting. Over time, you may find yourself needing fewer presets as your manual painting skills improve, but the efficiency gained during the learning curve remains invaluable. Whether you are a freelancer building a portfolio or a hobbyist exploring digital art, these tools provide a solid foundation for creating compelling natural scenes.
In conclusion, integrating Grass Procreate Brushes into your workflow is a strategic decision that enhances both speed and quality. By understanding their features, respecting their compatibility constraints, and applying them with thoughtful technique, you can elevate your digital landscapes. The key lies not just in owning the tools, but in knowing how to weave them seamlessly into your creative process, allowing you to focus on what matters most: bringing your artistic vision to life.